If you want to compress images on Mac, you already have two built-in options:
- Preview (a direct option for one image)
- Finder Quick Actions / Shortcuts (a convenient option for a mixed-format batch)
Method 1: Compress a single image with Preview
Step 1: Open the image in Preview
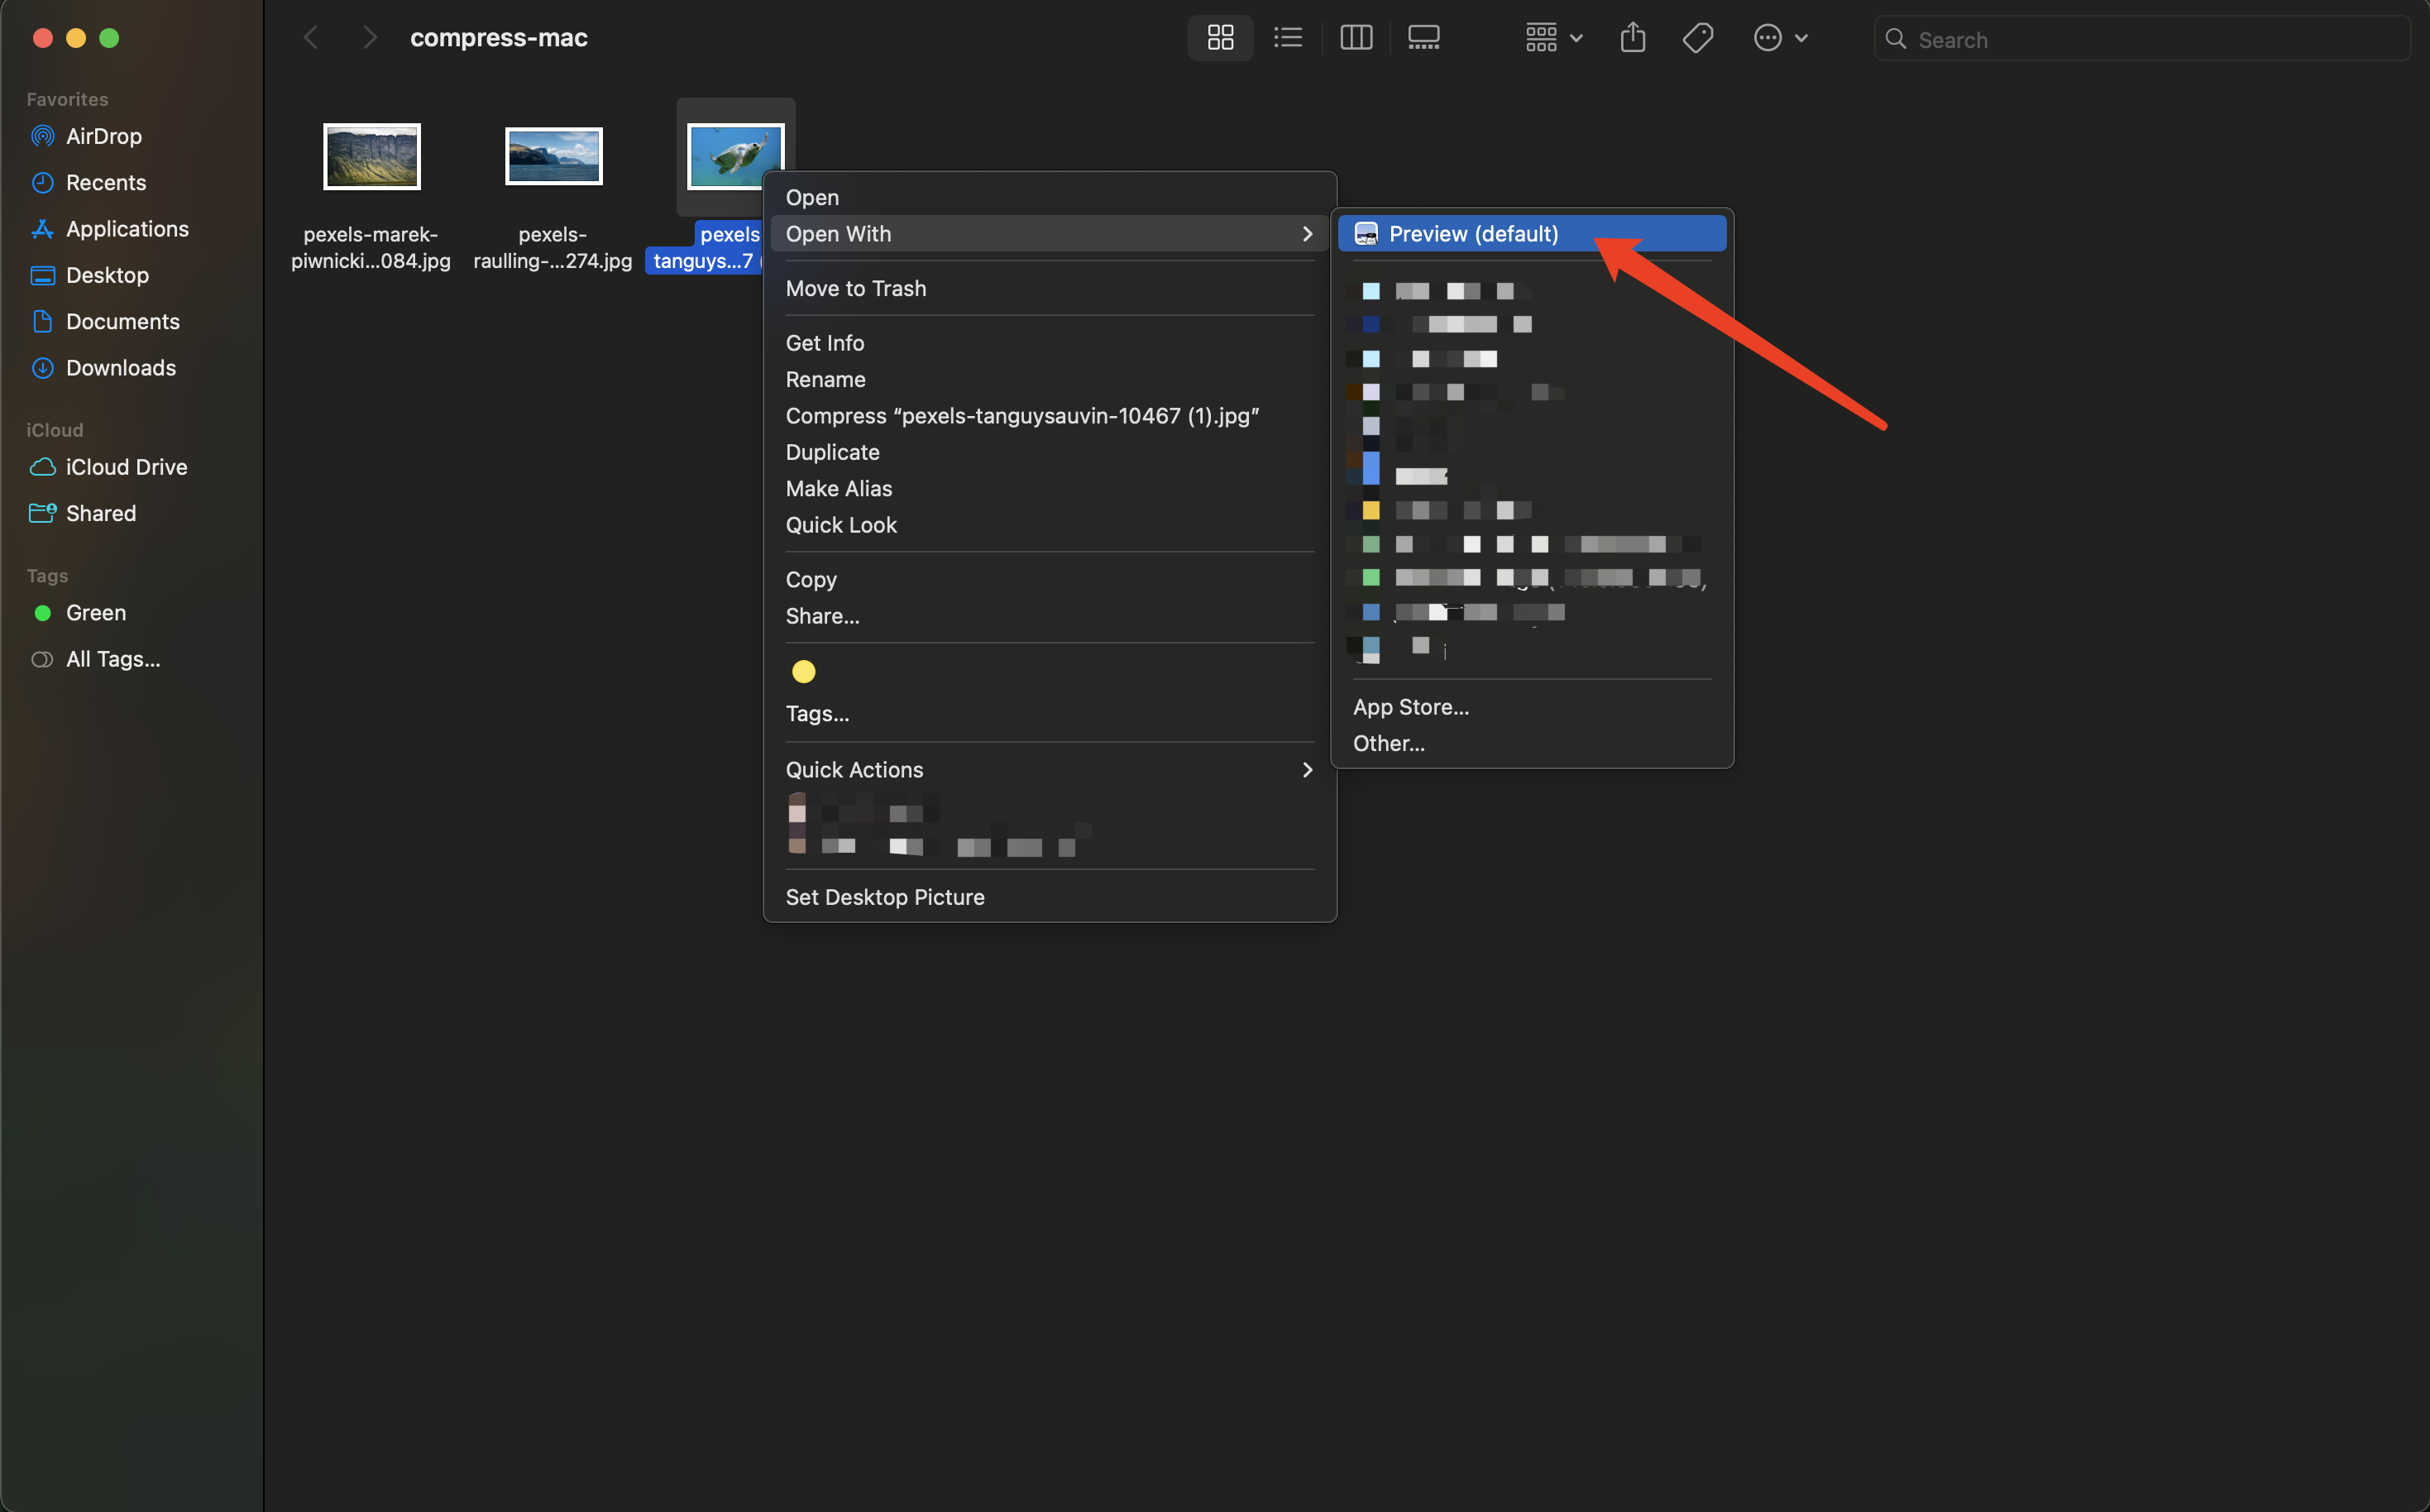
Open an image from Finder, or right-click and choose Open With → Preview.
Step 2: If the image is too large, resize it first
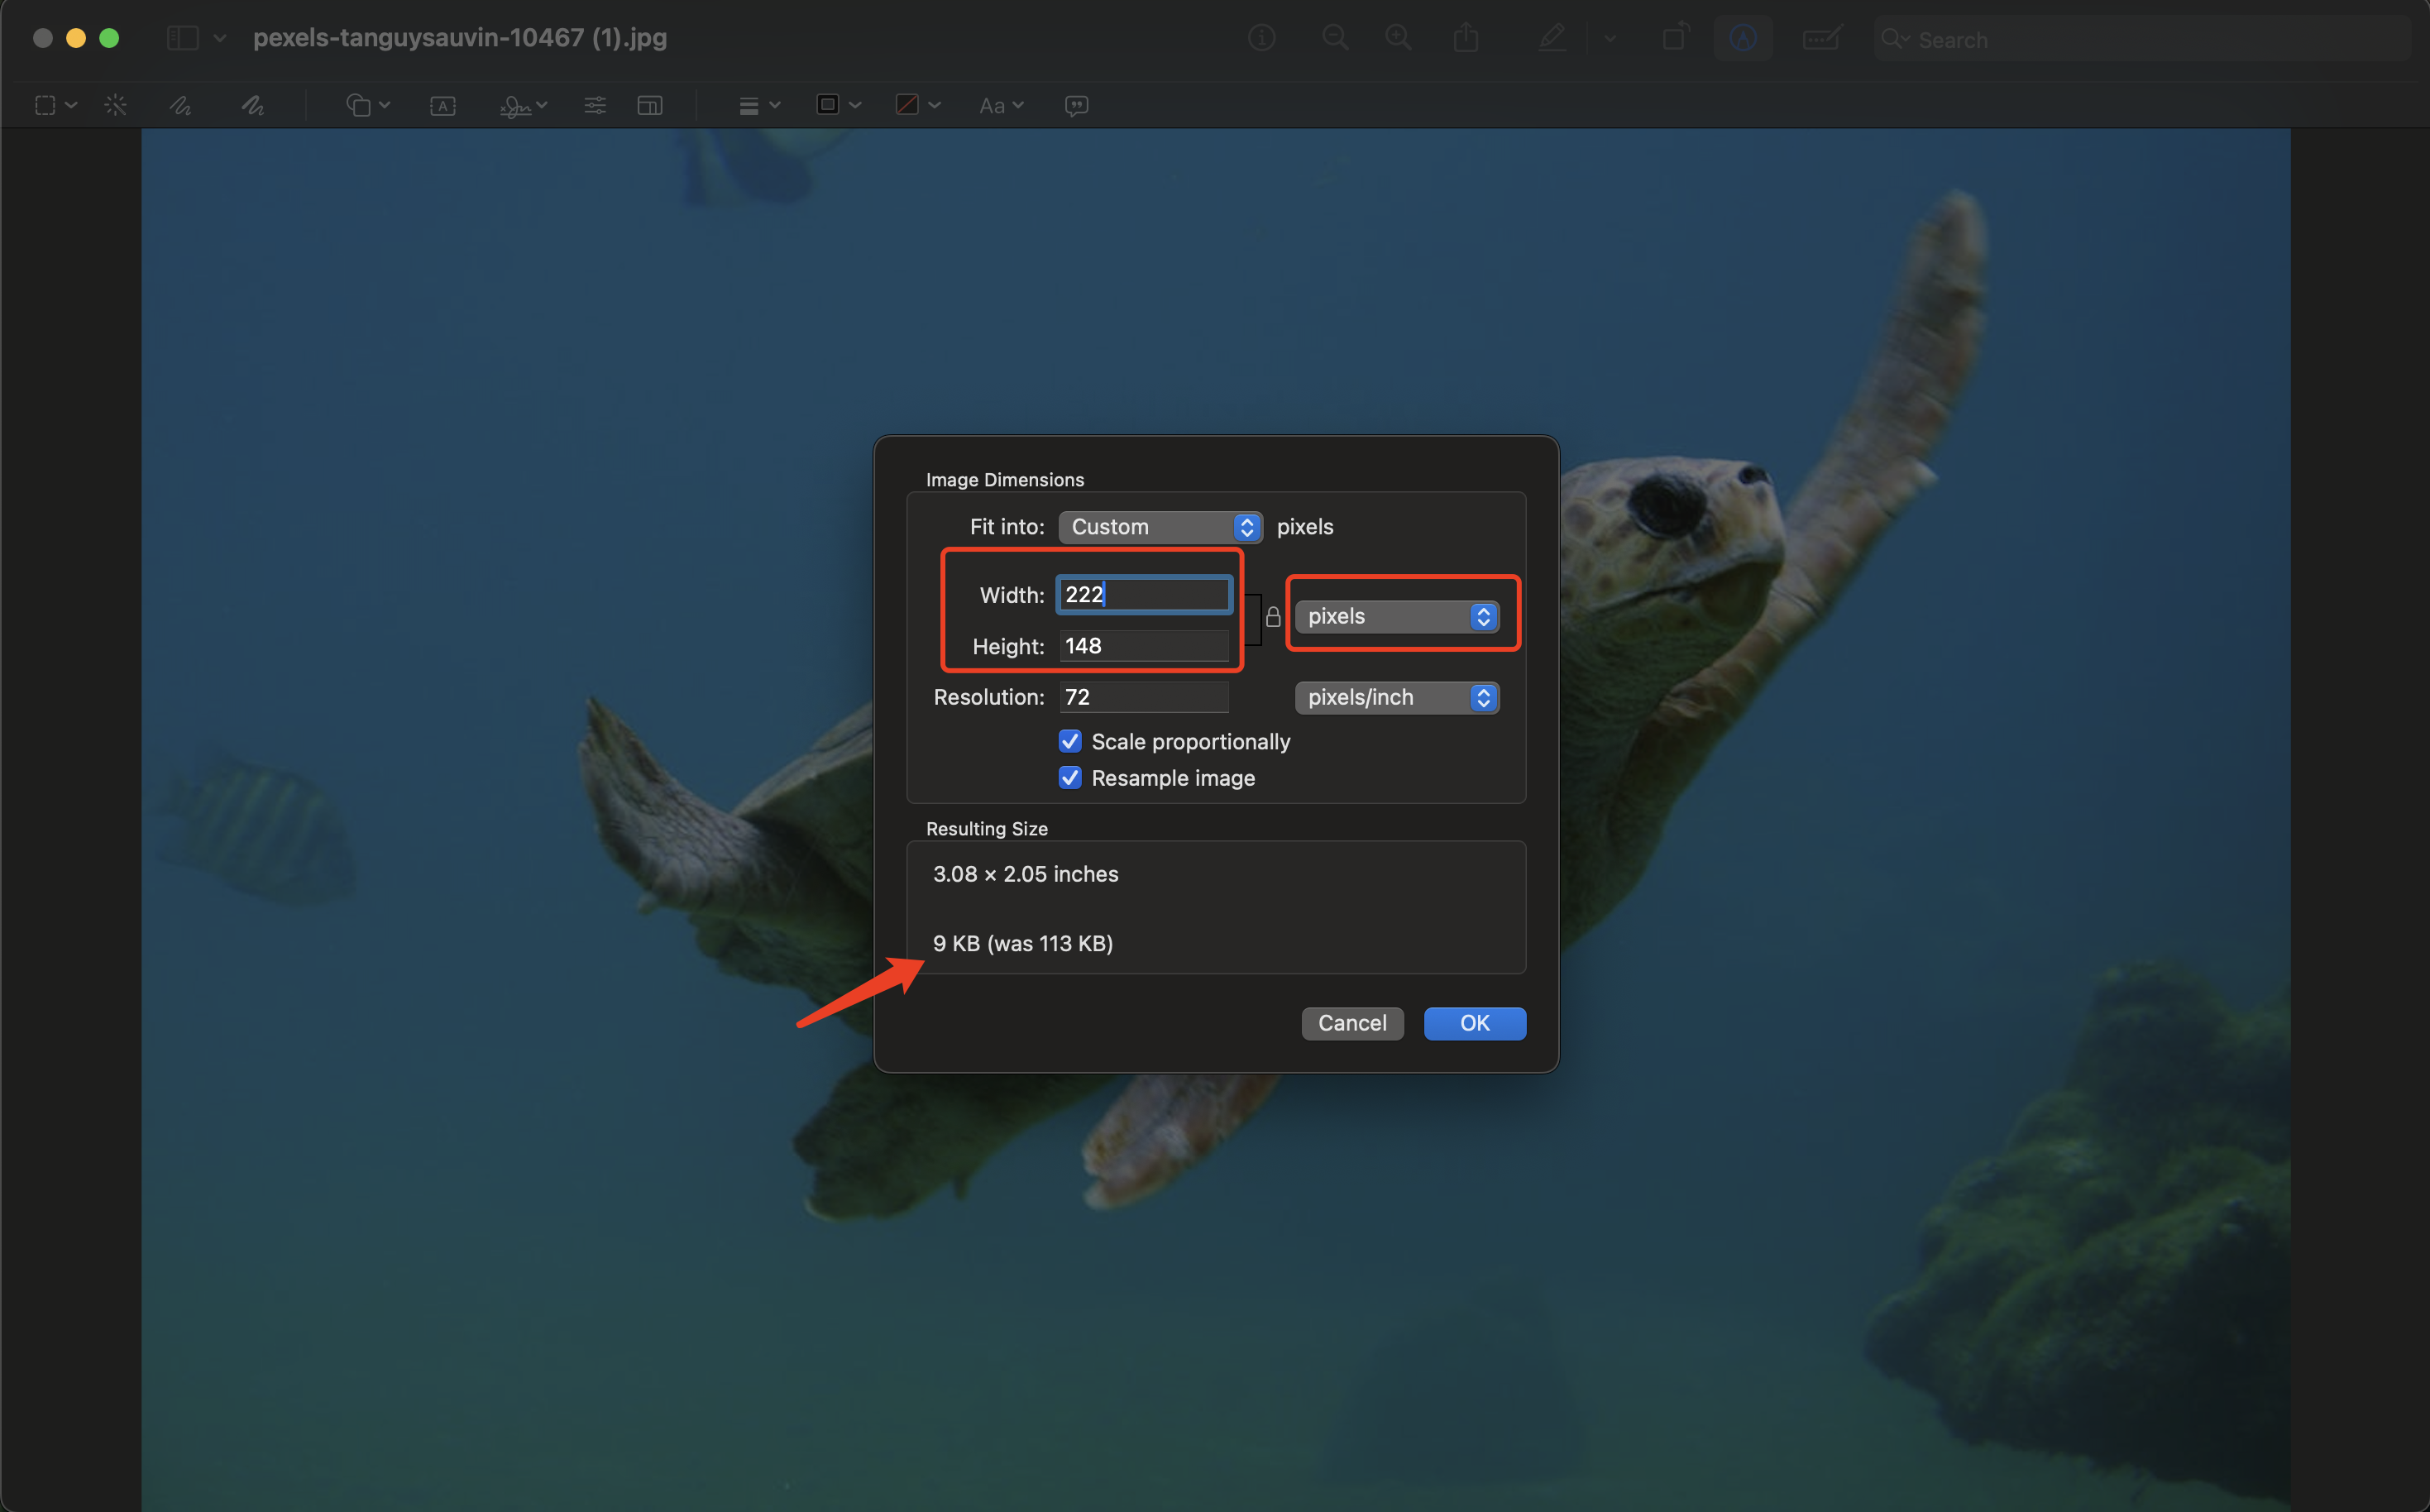
Reducing dimensions can remove more file weight than another strong encoding pass when the source is much larger than the destination needs.
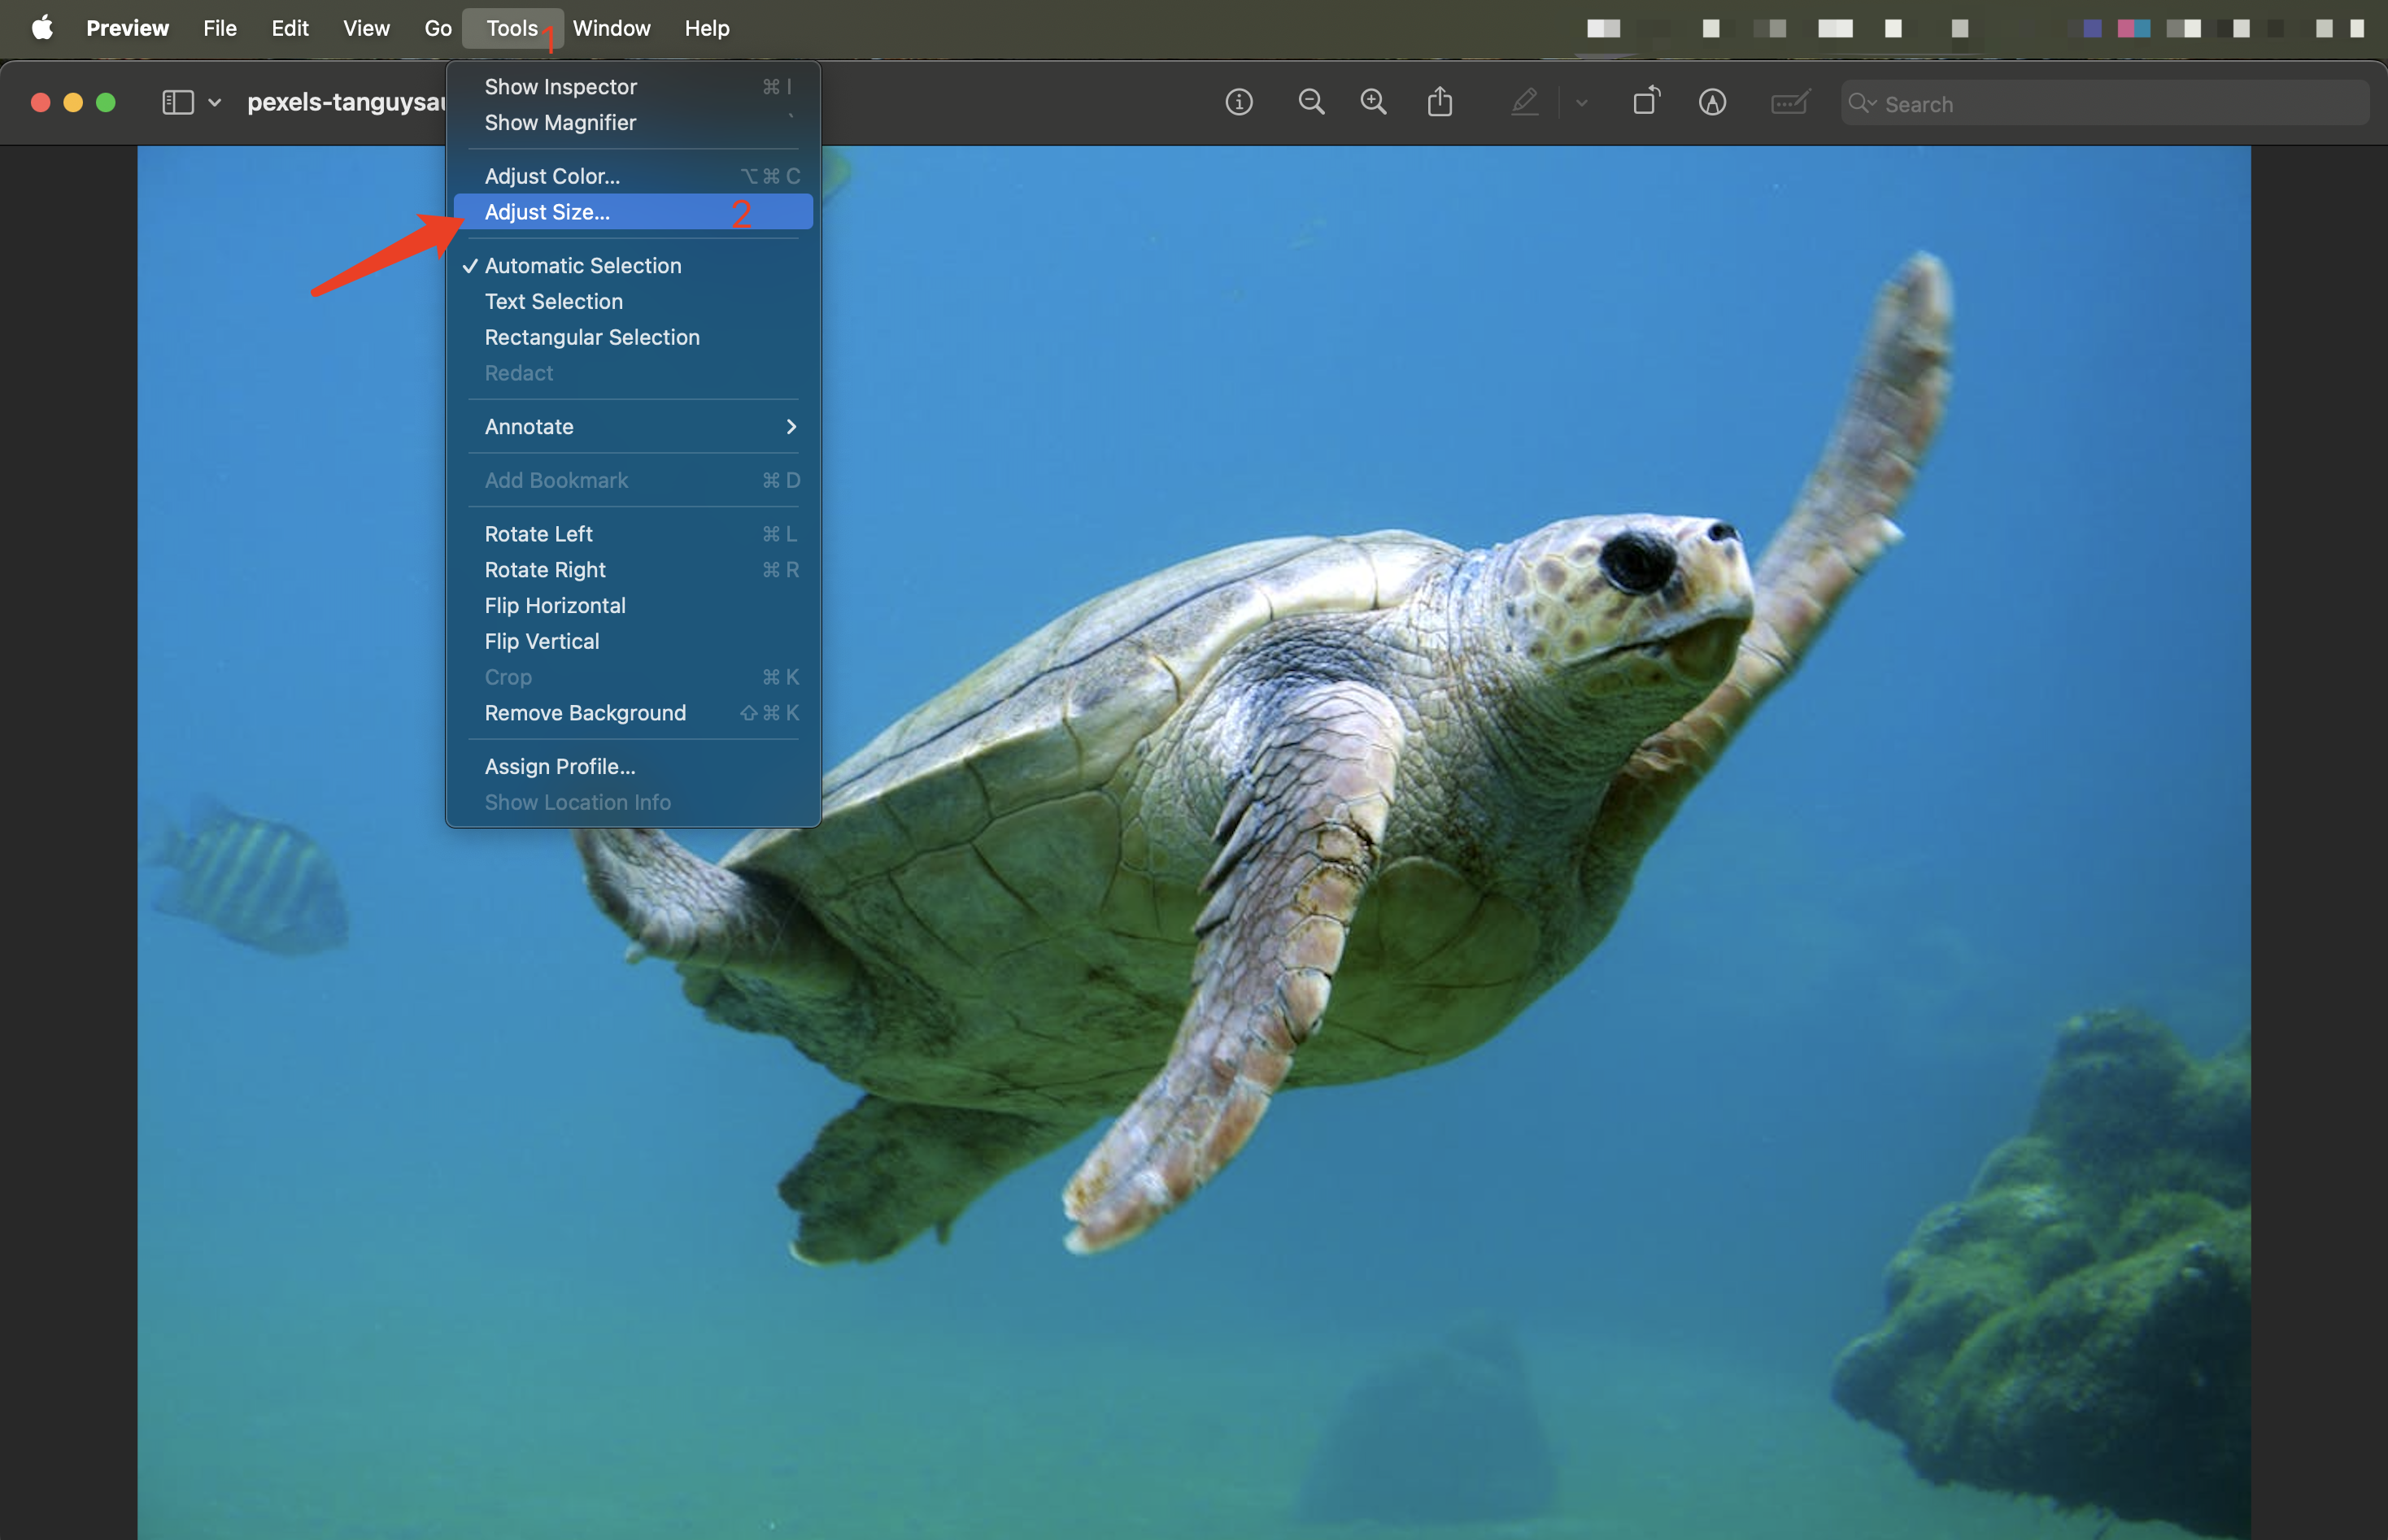
In Preview, go to Tools → Adjust Size…, then reduce the width/height to what you actually need.
Limitation: This workflow is straightforward for a single image, but it becomes slow for large batches—and it does not consistently hit a strict size target (KB/MB) across different files.
Method 2: Batch compress with Finder Quick Actions / Shortcuts (mixed formats)
Mac also supports batch processing in Finder.
Common batch actions include:
- Convert Image (convert format)
- Resize Images (small / medium / large)
Exact options may vary depending on your macOS version and enabled actions.
Step-by-step (Convert Image)
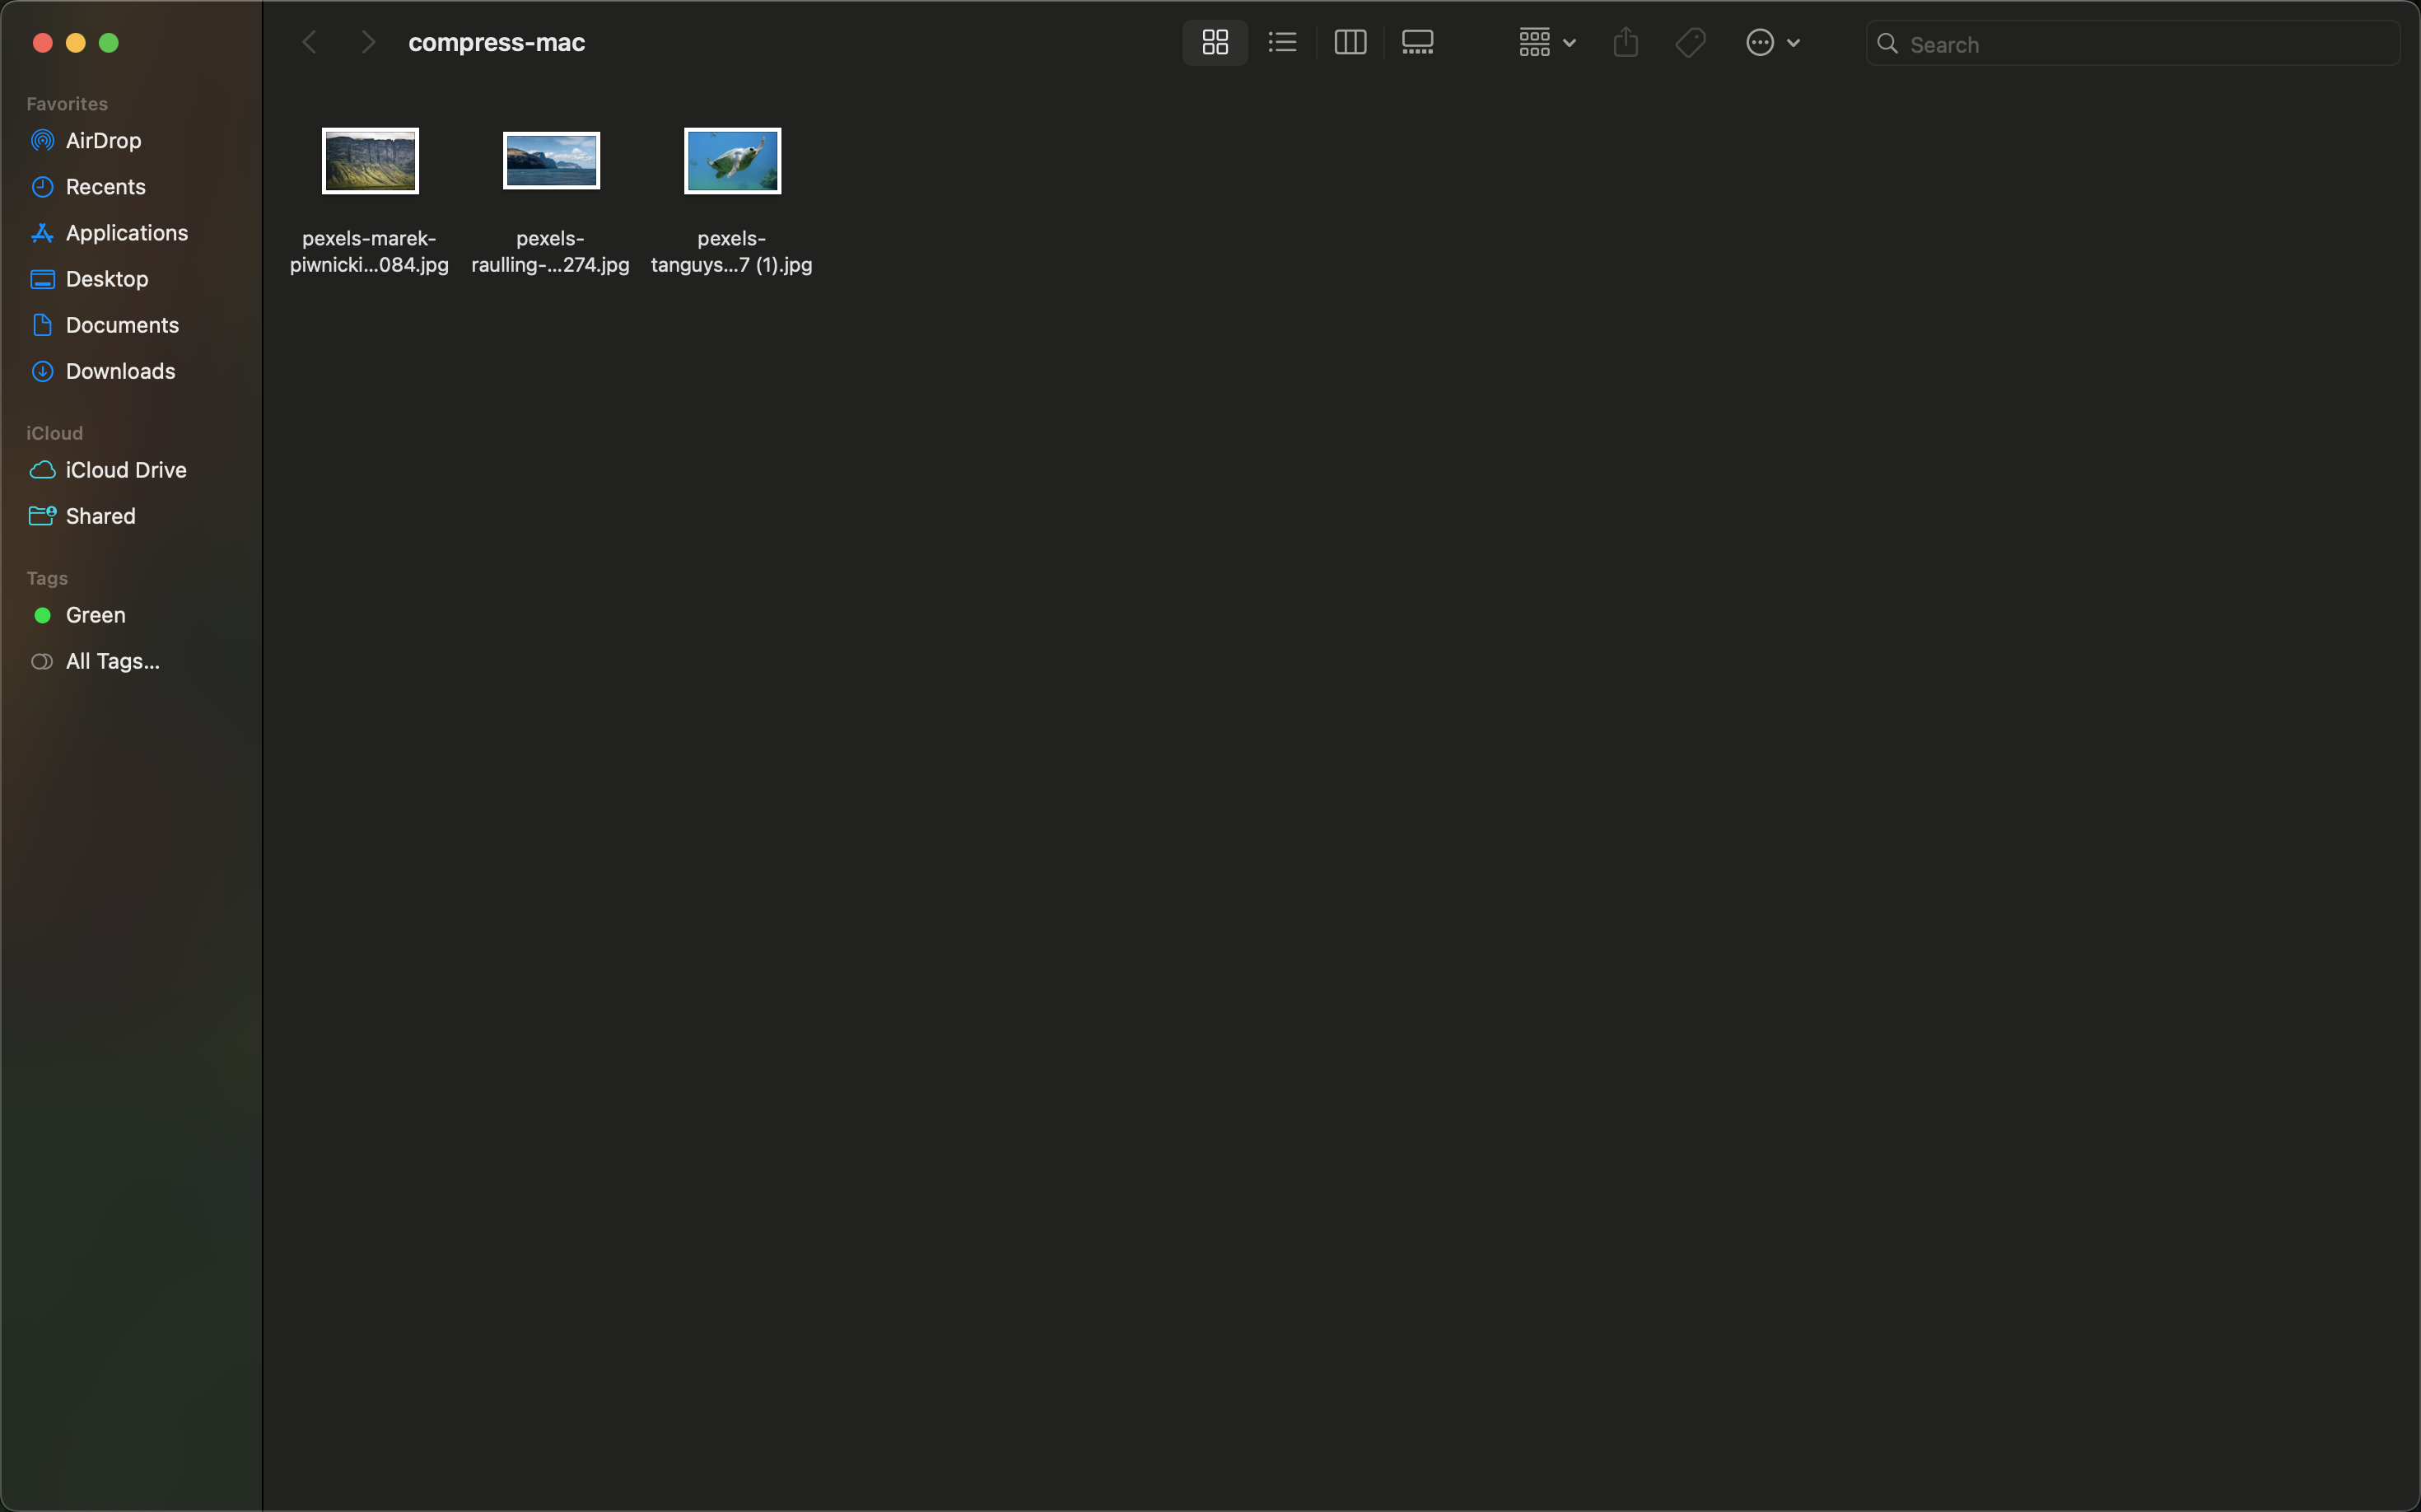
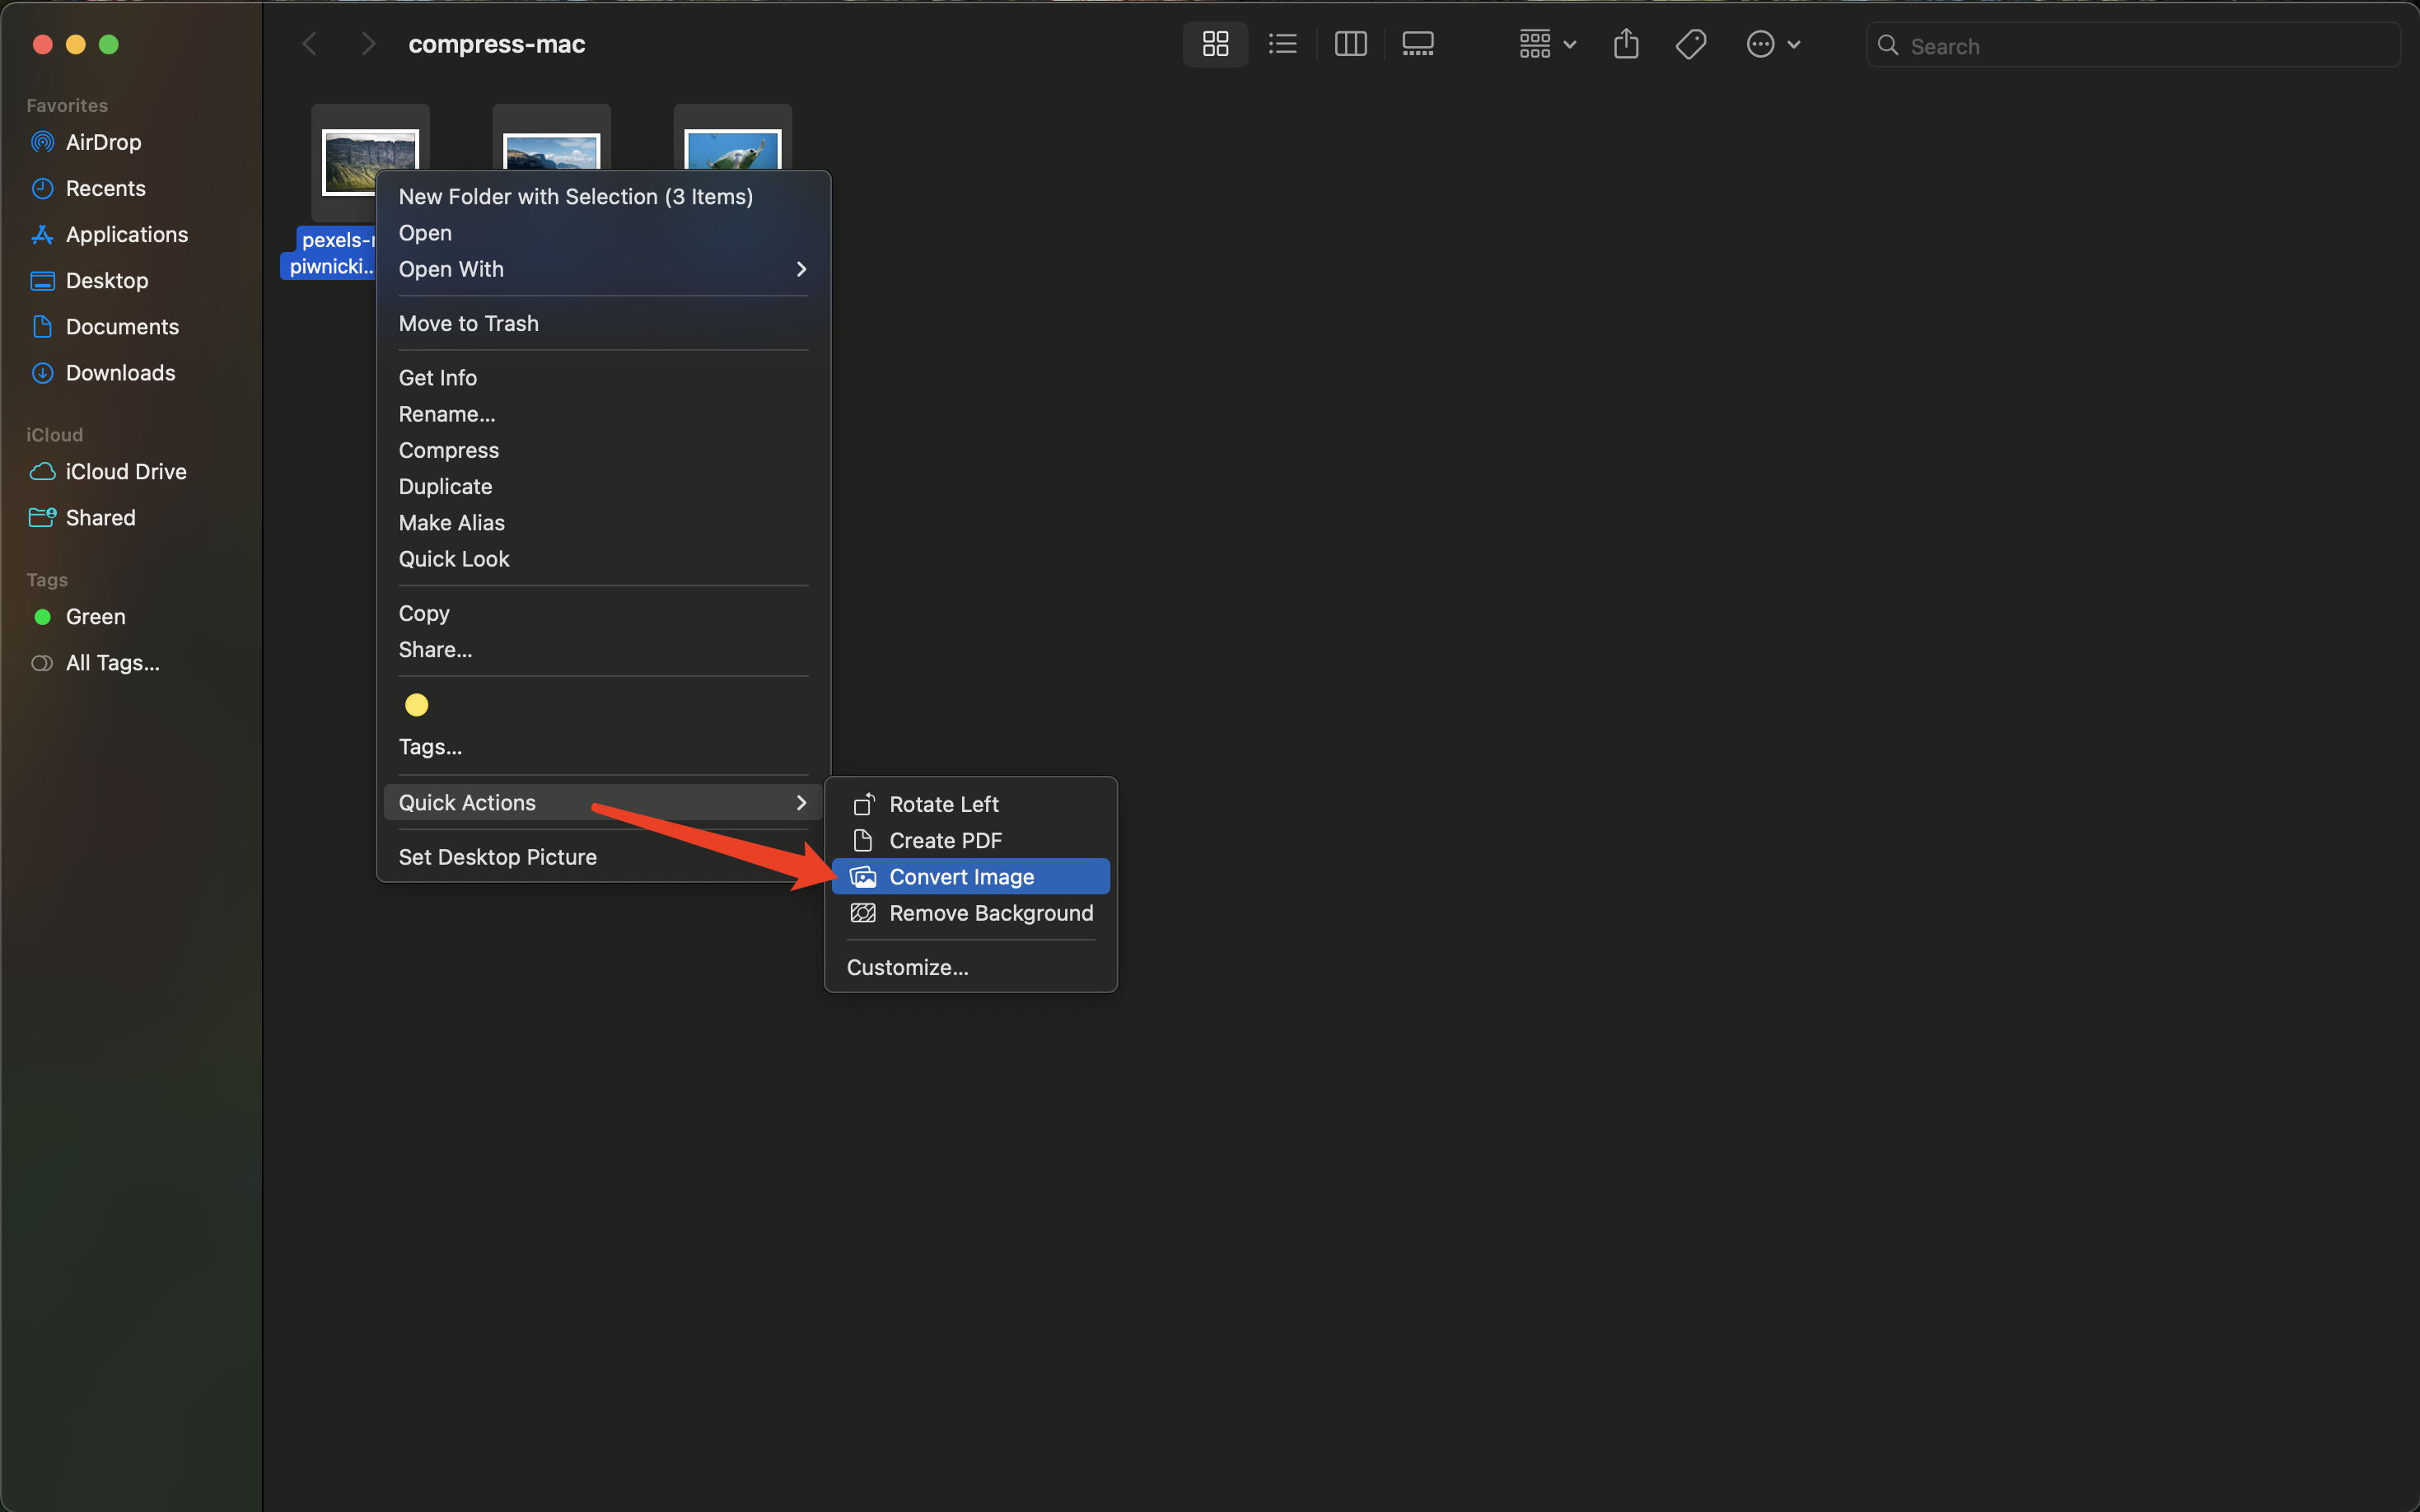
- In Finder, select multiple images (mixed formats are OK).
- Right-click → Quick Actions → Convert Image.
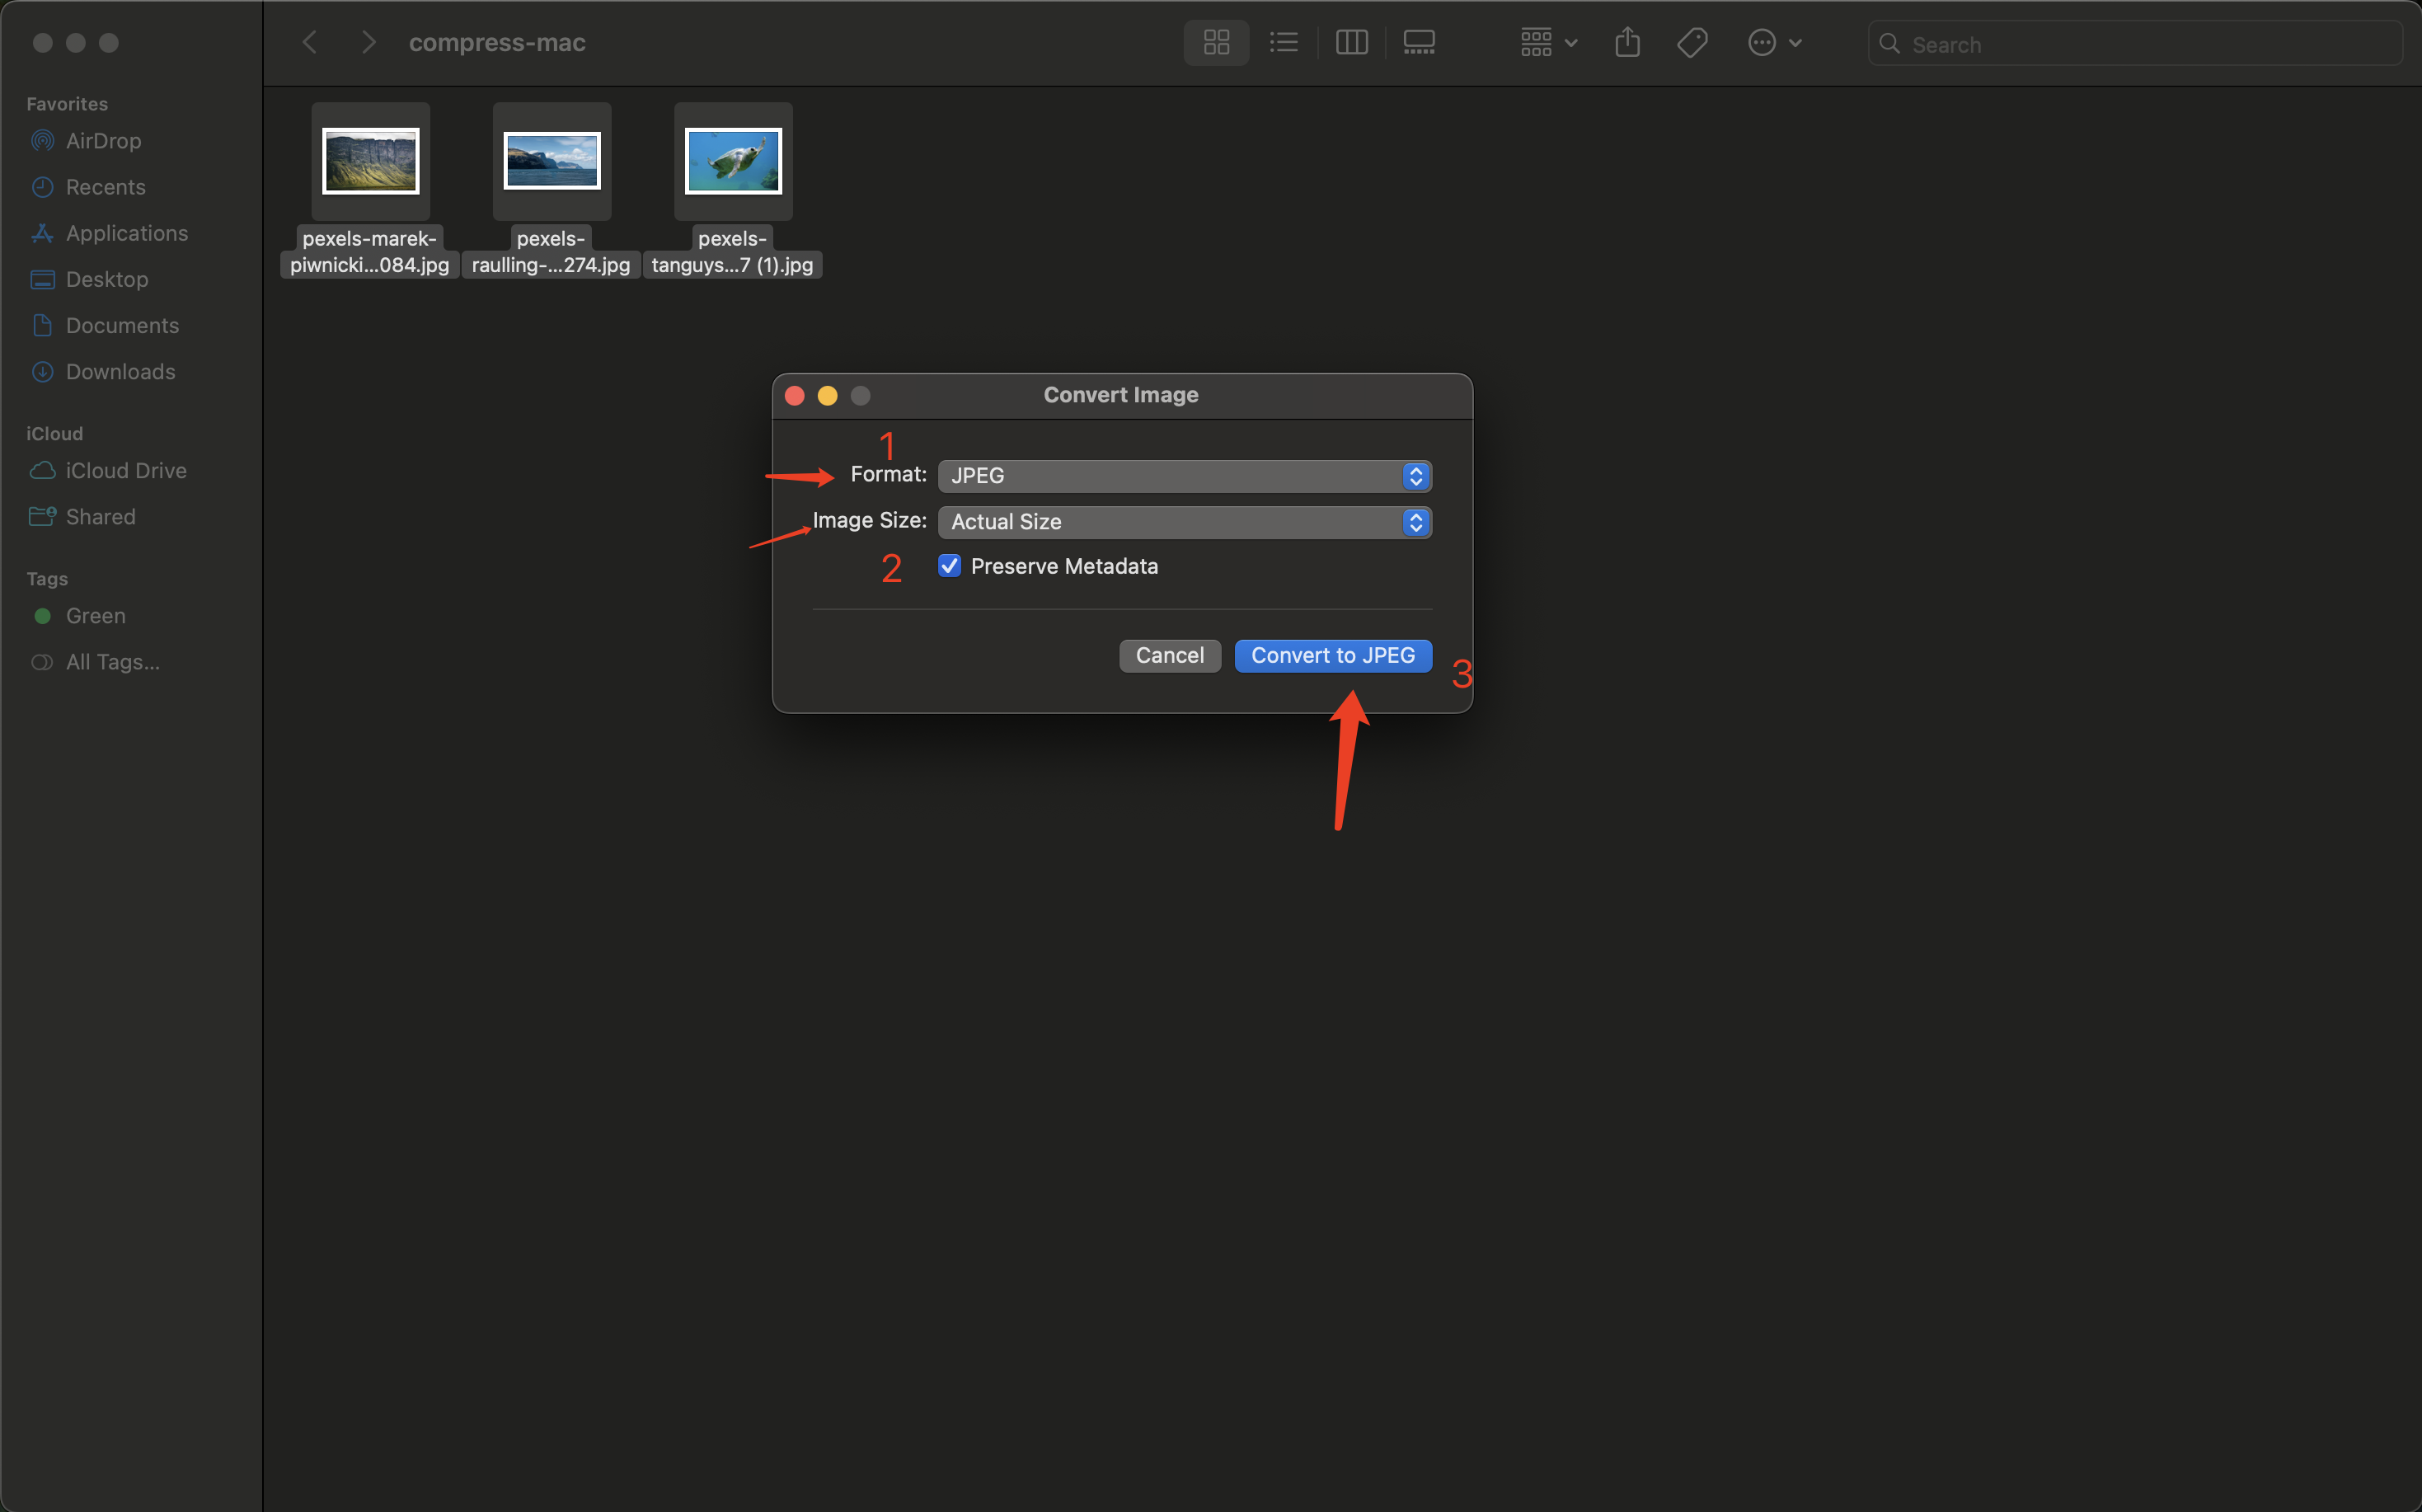
- In the dialog:
- Choose Format (for example, JPEG)
- Choose Image Size (Actual Size / Small / Medium / Large)
- (Optional) toggle Preserve Metadata
- Click Convert to ... to start.
The key limitation (important)
This method is mostly “dimension/format batch processing”. It’s useful, but:
- It’s not friendly for “compress to under X KB/MB”.
- Results vary depending on the image content and format.
- It’s harder to run a controlled “as small as possible, but still looks good” workflow.
- There’s no quality slider or “target file size” input for fine-tuning.
A target-size option: Use PhoEdit for a KB or MB limit
PhoEdit is designed for batch workflows:
- Upload multiple images at once (mixed formats are OK).
- Choose a preset for a quick quality/size balance.
- Or use Custom target file size when you need to work toward a specific limit.
- Download a single image or a ZIP for a batch.
Open the tool:
Step-by-step (custom target KB/MB)
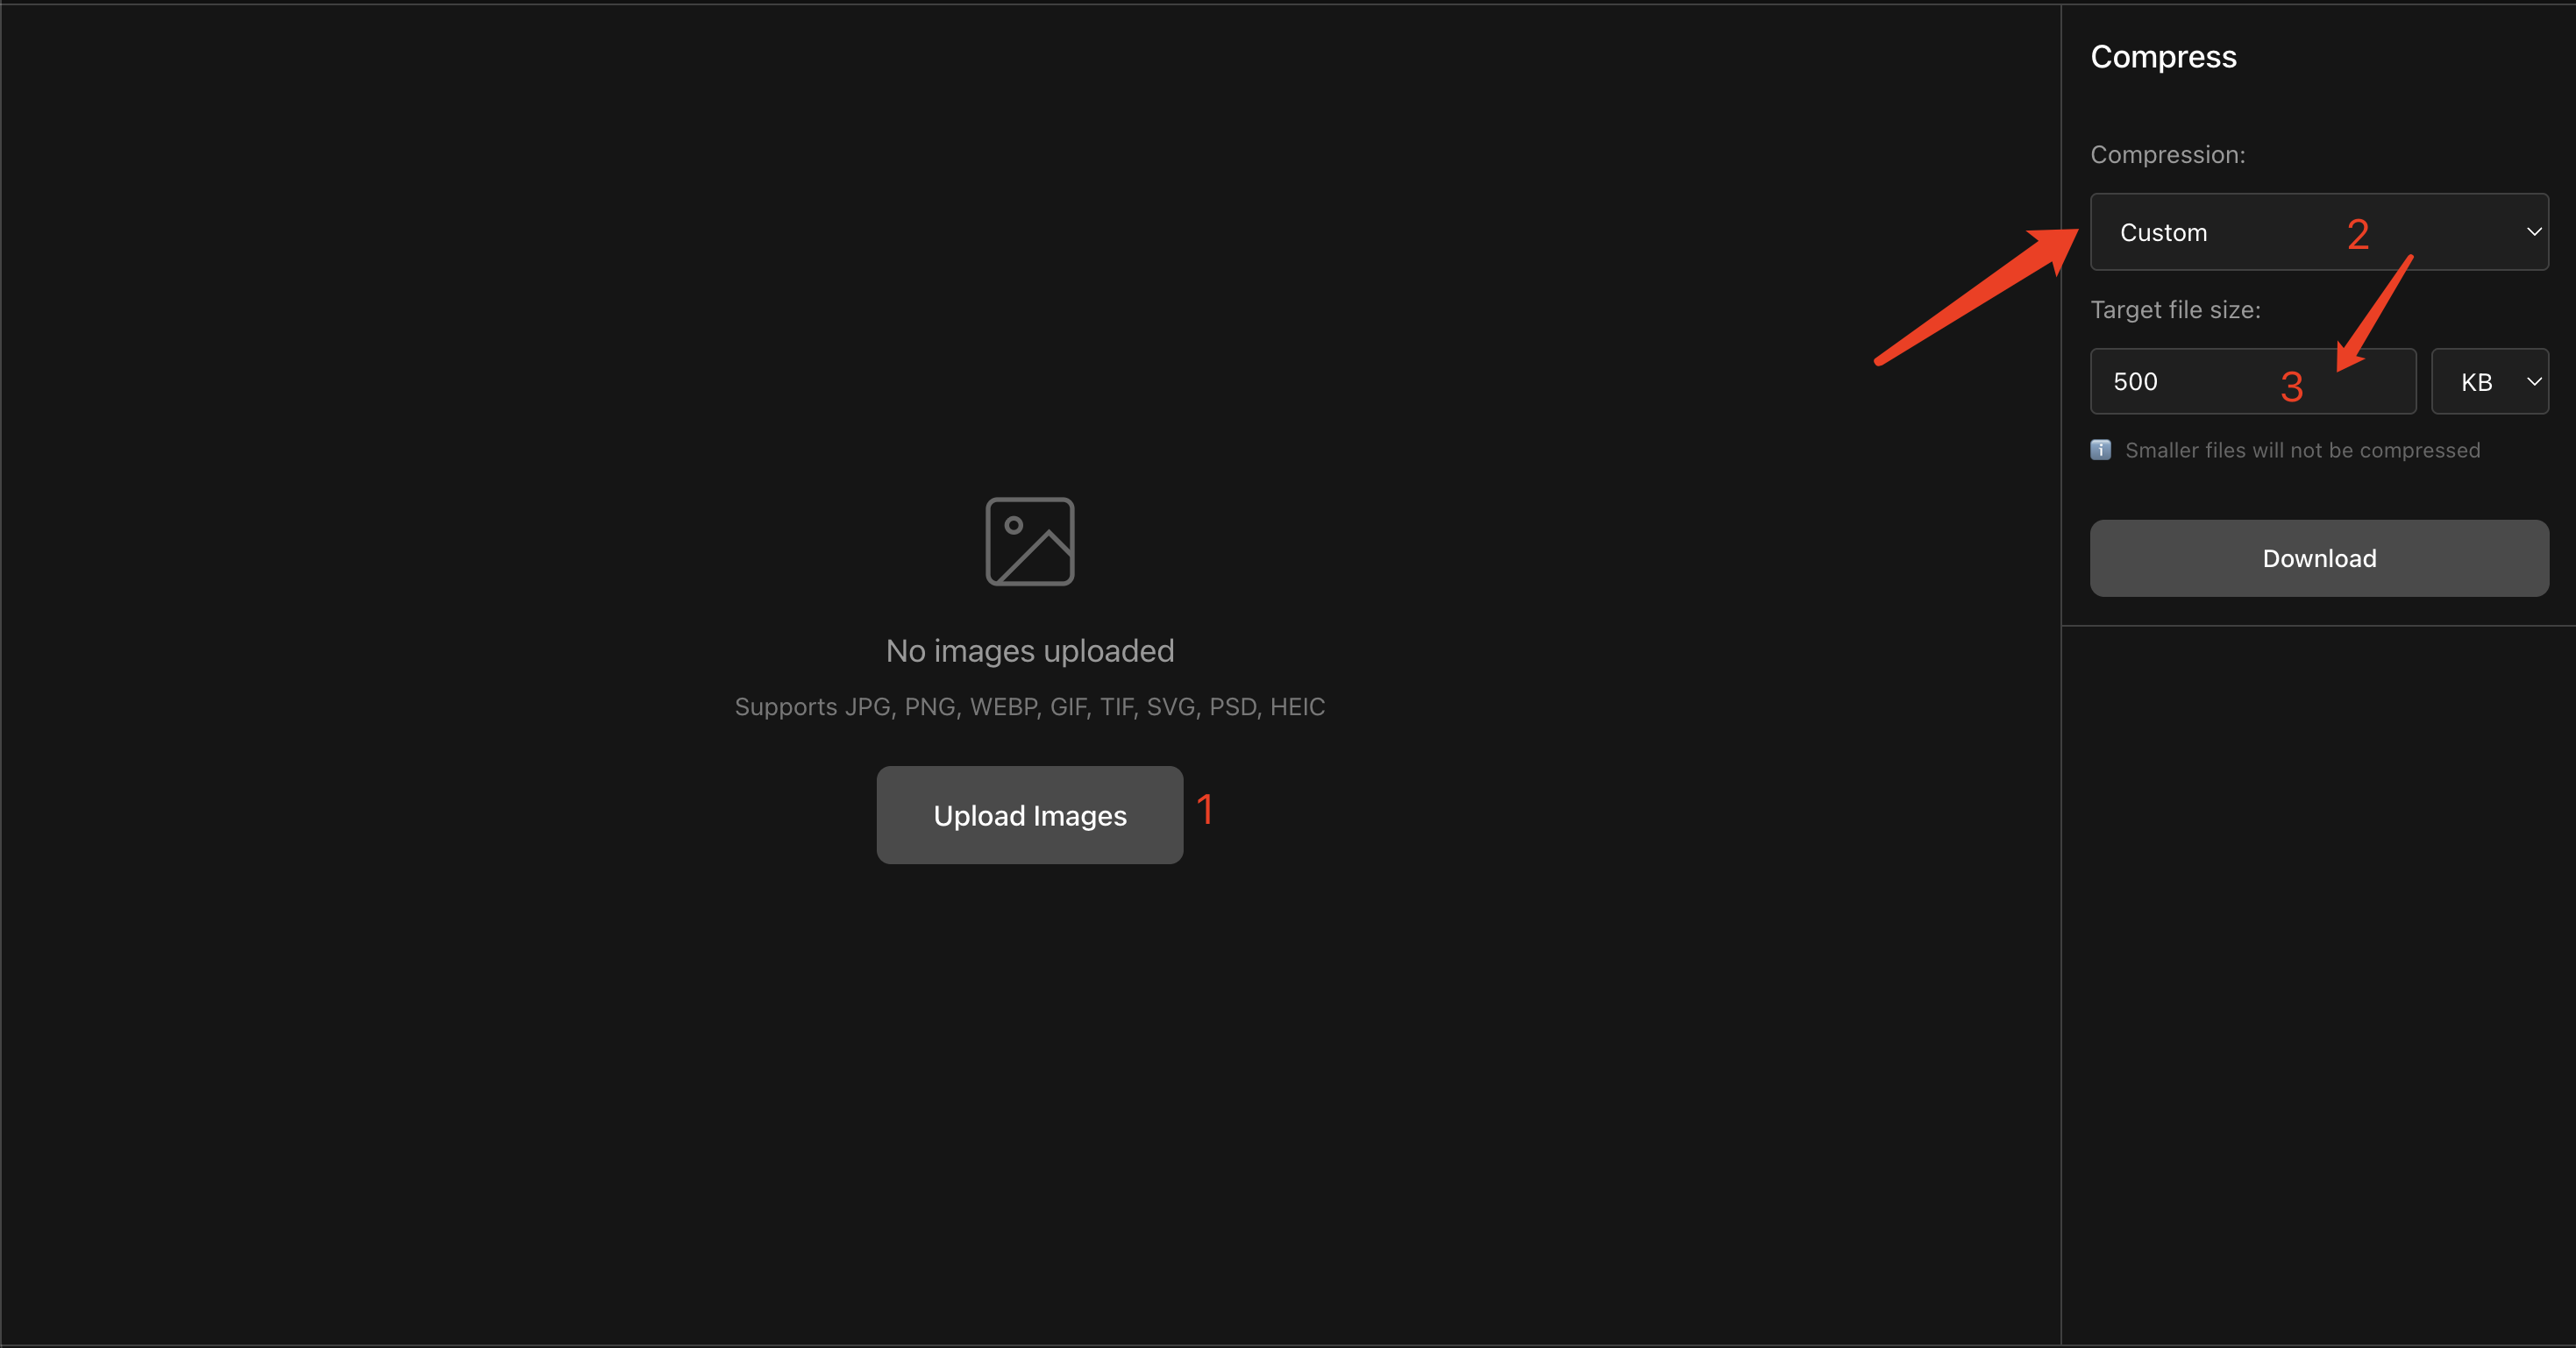
- Upload your image(s).
- In Compression, choose Custom.
- Set a target size (e.g.,
500 KBor1 MB). - Click Download.
For a deeper guide to lighter and stronger presets, target-size checks, and batch compression, see:
Quick recommendation
- Only one image? Use Preview.
- A folder of mixed images and you don’t need a strict size target? Use Finder batch actions.
- Need batch compression and a KB/MB target with a controlled quality/size review? Use PhoEdit: Compress Image